


How to Use Your Phone Camera for Gorgeous Travel Shots: A Comprehensive Guide
Roy Mullins
8/9/2024
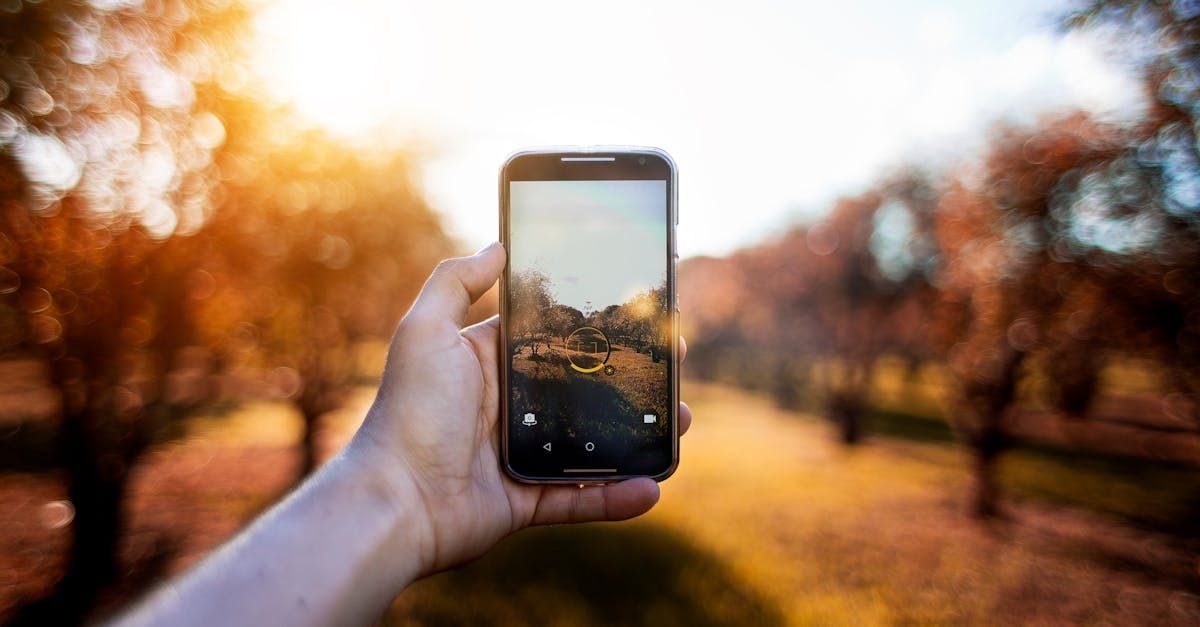
In the age of smartphones, capturing stunning travel photos no longer requires expensive DSLR cameras. With advancements in phone camera technology, it's easier than ever to take professional-looking photos right from your pocket. This guide will walk you through essential tips and techniques to help you use your phone camera to its full potential, ensuring your travel memories are captured in all their glory.
1. Understand Your Phone’s Camera Capabilities
Before diving into photography techniques, it’s crucial to familiarize yourself with your phone’s camera features. Modern smartphones come equipped with multiple lenses, each designed for specific types of shots:
Wide-Angle Lens: Great for landscapes and cityscapes, capturing more of the scene in one frame.
Telephoto Lens: Ideal for zooming in on distant subjects without losing image quality.
Ultra-Wide Lens: Perfect for expansive vistas or when you want to add dramatic perspective to your shots.
Night Mode: Enhances low-light photography by adjusting the camera settings automatically.
Spend some time experimenting with these features before your trip so you know exactly how to use them in different scenarios.
2. Composition: The Rule of Thirds and Beyond
Composition is key to transforming an ordinary photo into an extraordinary one. The rule of thirds is a fundamental principle that can dramatically improve your shots:
Rule of Thirds: Imagine your frame divided into nine equal parts by two horizontal and two vertical lines. Place your subject along these lines or at their intersections for a balanced and visually appealing photo.
Beyond the rule of thirds, consider the following composition techniques:
Leading Lines: Use natural lines in the environment, like roads, rivers, or pathways, to guide the viewer’s eye to the main subject.
Framing: Look for natural frames like doorways, windows, or arches to add depth and focus to your shot.
Symmetry: Capture symmetrical scenes, such as reflections on water or architectural details, for a pleasing and harmonious image.
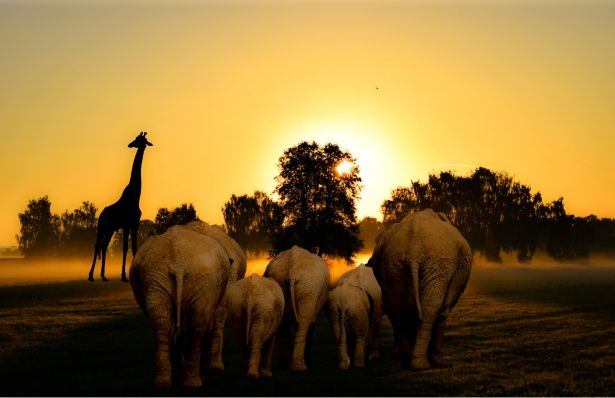
3. Lighting: The Golden Hour and Natural Light
Lighting can make or break a photo. The quality, direction, and intensity of light all play a significant role in how your photos turn out:
Golden Hour: The hour after sunrise and the hour before sunset are known as the golden hours, providing soft, warm, and diffused light that is perfect for photography. The shadows are less harsh, and the colors are more vibrant, making this the ideal time to shoot.
Natural Light: Always prefer natural light over artificial lighting. Position yourself so that the light falls on your subject from the side or slightly behind to create depth and contrast.
Avoid Harsh Midday Sun: The bright overhead sun can create unflattering shadows and washed-out colors. If you must shoot during midday, find some shade or use reflective surfaces to soften the light.
4. Mastering Focus and Exposure
Even with the best composition and lighting, a photo can fall flat if it’s not properly focused or exposed:
Tap to Focus: On most smartphones, you can tap on the screen to focus on a specific area. This is particularly useful when you want to highlight a particular subject in the foreground while keeping the background slightly blurred.
Adjust Exposure: After tapping to focus, you can usually adjust the exposure by sliding your finger up or down. Increasing the exposure brightens the image, while decreasing it darkens it. Be careful not to overexpose (too bright) or underexpose (too dark) your shot.
Lock Focus and Exposure: For challenging lighting situations, you can lock the focus and exposure to prevent the camera from automatically readjusting when you move. This is useful for capturing consistent shots, especially when photographing moving subjects.
5. Experiment with Perspectives and Angles
One of the easiest ways to make your travel photos stand out is by experimenting with different perspectives and angles:
Low Angle: Shooting from a low angle can make subjects appear larger than life and create a sense of grandeur. This works well for capturing architecture, monuments, or towering trees.
High Angle: Conversely, shooting from a high angle, such as from a rooftop or drone, can provide a unique vantage point and a broader view of the landscape.
Dutch Angle: Tilting your camera slightly to create a diagonal line can add a dynamic, edgy feel to your photos, especially in urban settings.
Close-Ups and Details: Don’t forget to capture the small details that tell a story, like the texture of a cobblestone street, the intricate design of a local dish, or the vibrant colors of a market stall.
6. Utilize Editing Apps to Enhance Your Photos
Editing is an essential step in the photography process that can elevate your travel photos from good to great. Here are some tips on how to use editing apps effectively:
Basic Adjustments: Start with basic adjustments like cropping, straightening, and adjusting brightness, contrast, and saturation.
Filters: Many editing apps offer filters that can enhance the mood of your photo. However, use them sparingly to avoid over-processing your images.
Selective Editing: Use tools that allow you to selectively adjust certain areas of your photo, such as increasing the brightness of a dark foreground while leaving the sky untouched.
Popular Apps: Consider using apps like Adobe Lightroom, Snapseed, or VSCO for their robust editing features and user-friendly interfaces.
7. Tell a Story with Your Photos
The best travel photos are those that tell a story. Instead of just snapping random shots, think about the narrative you want to convey:
Sequence of Events: Capture a series of photos that show a journey or process, such as the preparation of a local dish or the unfolding of a festival.
Emotion and Expression: Focus on the people you meet and their expressions to convey the emotions of a place. Whether it’s the joy of children playing or the calm of a solitary wanderer, capturing emotions adds depth to your photos.
Cultural Elements: Include cultural elements in your photos, such as traditional clothing, local cuisine, or architectural styles, to give viewers a sense of the place you’re visiting.
8. Practice and Patience: The Keys to Improvement
Becoming proficient in phone photography doesn’t happen overnight. The more you practice, the better your photos will become:
Trial and Error: Don’t be afraid to take multiple shots of the same scene with different settings, angles, and compositions. Review your photos and learn from what works and what doesn’t.
Study Great Photographers: Follow travel photographers on social media or browse photography websites to study the work of others. Analyze their composition, use of light, and storytelling techniques to inspire your own work.
Be Patient: Sometimes, the perfect shot requires waiting for the right moment, whether it’s the golden light of sunset or the perfect wave crashing against the shore. Patience can pay off with truly stunning results.
9. Backup Your Photos Regularly
Finally, don’t forget to back up your photos regularly to avoid losing your precious memories:
Cloud Storage: Use cloud storage services like Google Photos, iCloud, or Dropbox to automatically back up your photos. This also allows you to access your images from any device.
External Drives: Consider transferring your photos to an external hard drive or USB for an additional layer of security.
With a little knowledge and practice, your phone camera can become a powerful tool for capturing breathtaking travel photos. By understanding your camera’s capabilities, mastering composition, lighting, and editing, and telling compelling visual stories, you’ll be well on your way to creating a stunning travel portfolio that you’ll cherish for years to come. Happy shooting!

Contact Us
Share
The Informed Traveler


Main Street Travel
Your Passport To Anywhere!
Contact Us
216 E. Main Street
Front Royal, VA 22630
540-636-1634
Menu